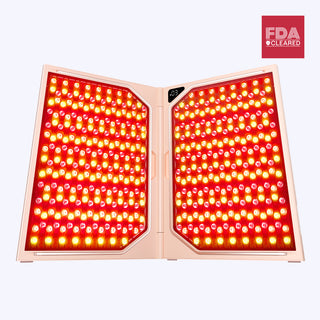
 Ulike ReGlow Pro★ 5.0 (511)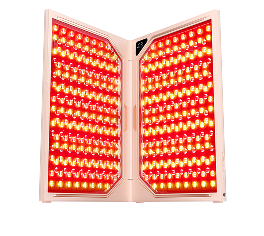




-
Always cleanse and dry skin completely before your session.
-
Avoid retinoids, acids, and whitening ingredients right before treatment.
-
Apply serum, then moisturizer, after your session for potentially better absorption.
-
Ulike specifically recommends a toner step for basic moisturizing before use.
An LED mask session is only as effective as the skin it's treating. What you put on your face — or don't — right before and after your session can meaningfully affect how well the light penetrates and how your skin responds afterward. Here's a step-by-step guide to building the right skincare routine LED mask users should follow.
It's easy to treat an LED mask as a standalone gadget that works in isolation, but the reality is it's one part of a broader routine, and the steps immediately before and after your session can genuinely make the difference between a mediocre and a great result over time.

Table of Contents:
- Part 1: Before Your Session: Start With a Completely Clean Face
- Part 2: After Your Session: Locking In the Benefits
- Part 3: Common Mistakes That Quietly Reduce Results
- Part 4: Letting Your Routine Evolve With the Seasons
- Part 5: The Exact Sequence Ulike Recommends for ReGlow
- Part 6: Building This Routine Around Ulike ReGlow
- Part 7: Conclusion
- Part 8: Frequently Asked Questions
Part 1: Before Your Session: Start With a Completely Clean Face
Why a Clean Face Matters Most
This is the single most important step, and it's the one people skip most often. Makeup, sunscreen, oil, and even some heavier moisturizers can physically block light from reaching the skin, reducing the effectiveness of your session. Cleanse thoroughly with a gentle, non-stripping cleanser and pat dry before putting on your mask. The WebMD overview of LED light therapy similarly notes that at-home devices work by exposing clean skin directly to specific wavelengths, which is part of why a barrier-free surface matters so much for results. Avoid applying serums, oils, or heavy creams directly before your session unless your specific device's instructions say otherwise — a completely bare, clean face allows for the most direct light penetration. If you wear sunscreen daily, make sure you're starting from a freshly cleansed face rather than assuming a quick wipe is sufficient.
Ingredients to Avoid Right Before Light Therapy
- Retinoids and strong exfoliating acids — these can increase photosensitivity.
- Products containing certain essential oils, which may increase light sensitivity for some people.
- Whitening or brightening actives with photosensitizing ingredients.
- Heavy, occlusive creams that create a physical barrier over the skin.
- Fresh chemical exfoliation (peels) — wait until skin has fully recovered.
If you use active ingredients like retinol as part of your regular routine, it's generally best to apply them at a separate time of day from your light therapy session rather than layering them together.
Part 2: After Your Session: Locking In the Benefits
The Post-Session Absorption Window
Right after treatment is actually one of the best windows to apply skincare, since research on skin penetration suggests products may absorb more effectively into skin that has just been treated with light therapy. The American Academy of Dermatology notes that many dermatologists recommend pairing at-home red light sessions with a tailored skincare routine to help maintain results between treatments. This is a great time for a hydrating serum — ingredients like hyaluronic acid pair especially well here — followed by a moisturizer suited to your skin type. If you used a mode that includes blue light, a lightweight, non-comedogenic moisturizer is usually the better choice, since blue light sessions are often paired with acne-prone or oilier skin concerns. Finish the following morning with broad-spectrum SPF 30+, since consistent sun protection helps protect the collagen-supporting results you're working toward with each session.
Part 3: Common Mistakes That Quietly Reduce Results
Beyond skipping the cleanse step, a few other habits undercut results: wearing your mask with wet hair products or hairspray near the hairline (which can transfer to skin), rushing through sessions and cutting them short, and inconsistent scheduling that breaks up the cumulative cellular benefits. Cleveland Clinic points out that seeing improvement from LED light therapy requires regular, consistent treatments rather than occasional use, which is exactly why these small, repeated shortcuts matter more than they might seem to. None of these are dramatic mistakes, but small, repeated shortcuts add up over weeks of use. A single imperfect session isn't going to meaningfully derail your progress — treat the guidance here as a best-practice framework to aim for most of the time, not a strict rule that needs to be followed without exception.
Building a Weekly Product Rotation
Rather than using the exact same serum after every single session, some people find it helpful to rotate products based on their skin's needs that day — a hydrating serum on drier days, a lightweight brightening serum when focused on tone, or simply a basic moisturizer on days when you're keeping things minimal. This type of flexible rotation keeps the post-session step from feeling like a rigid obligation and allows you to be responsive to how your skin actually feels on any given day, rather than following an identical script regardless of your skin's current state.
Part 4: Letting Your Routine Evolve With the Seasons
The ideal post-session product routine can shift meaningfully between seasons. Lighter, gel-based hydrators that felt perfect in humid summer months may leave skin feeling under-moisturized in a dry winter climate, and vice versa. Revisiting your post-LED-mask product choices every few months, rather than assuming one routine works year-round, helps ensure your skin stays consistently well-supported.
The routine you start with in your first few weeks doesn't need to be the routine you stick with indefinitely, either. As your skin responds to consistent light therapy, you may find you need less intensive post-session hydration than when you started, or want to introduce a new active now that you've established a baseline. This style of periodic reassessment is a healthy habit generally in skincare — what your skin needs can shift with seasons, age, hormonal changes, and even stress levels. If you're ever unsure whether an adjustment makes sense, a quick consultation with a dermatologist or knowledgeable esthetician can help you calibrate, particularly if you're considering adding a new active alongside your existing light therapy routine.
Part 5: The Exact Sequence Ulike Recommends for ReGlow
Ulike's published instructions for ReGlow align closely with the general guidance above, with one specific addition: after cleansing and drying skin, Ulike recommends applying a toner for basic moisturizing, while specifically avoiding photosensitive products and products containing whitening ingredients before use.
- Cleanse and dry skin using a gentle cleanser that removes makeup, dirt, oil, and impurities.
- Connect the remote control to the mask.
- Long-press the power button to turn the device on, then short-press to cycle through Glow, Firm, Rejuvenate, and Clear modes.
- Sit back and relax while the session runs — meditating, reading, or watching a show all work.
Following this exact sequence — rather than piecing together a routine from general assumptions — ensures you're using the device as Ulike's published testing and clinical data were based on, which matters if you want your own results to reasonably track the documented outcomes.
Part 6: Building This Routine Around Ulike ReGlow
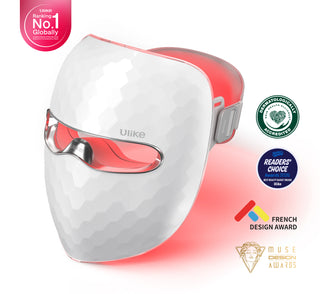
A routine like the one above is easiest to stick with when the device itself is built for a simple cleanse-treat-hydrate rhythm. That's the thinking behind a few specific parts of the Ulike ReGlow LED Light Therapy Mask's design:
- Four targeted modes in one device— Firm Mode (red 630nm + infrared 830nm) stimulates collagen for plumper skin and fewer wrinkles, Rejuvenate Mode (yellow 590nm + infrared 830nm) strengthens the barrier and calms redness, Clear Mode (blue 465nm + red 630nm + infrared 830nm) targets acne-causing bacteria, and Glow Mode (yellow 590nm + red 630nm + infrared 830nm) brightens tone and dullness.
- A tested, moderate schedule— 3 sessions a week, 1-2 modes per session, under 20 minutes total; Glow and Clear run 5 minutes, Firm and Rejuvenate run 8 minutes.
- A precisely engineered 1cm gap— keeps LEDs close enough for even light distribution while avoiding excess heat or skin contact issues.
- A 100-day money-back guarantee and 2-year warranty— so trying the routine described above carries little downside risk.
Each of ReGlow's four modes has a specific recommended duration, so you always know when your session ends and it's time to move into the serum-and-moisturizer step described above — one less decision to make in an already busy routine. If you'd like to compare modes and specs side by side, the rest of Ulike's LED Light Therapy Devices collection is worth a look.

Part 7: Conclusion
A completely clean face remains the single most important pre-session step, and the window right after treatment is a genuinely good time for serum and moisturizer application. Ulike specifically flags whitening ingredients as a category to avoid before a session, alongside the general photosensitizing actives discussed throughout this guide. Building a proper routine around this sequence — cleanse, treat, hydrate — matters more than any single product recommendation on its own.
Part 8: Frequently Asked Questions
Q1: Should I apply skincare before or after my LED mask session?
Cleanse skin completely before your session so nothing blocks the light, and save serums and moisturizers for after, when skin may absorb them more effectively.
Q2: Is it safe to use retinol with an LED mask?
Yes, but it's usually best to apply retinol at a separate time from your light therapy session rather than layering them together, since retinol can increase photosensitivity.
Q3: What should I apply immediately after red light therapy?
A hydrating serum followed by a moisturizer suited to your skin type is a popular choice, since the post-session window is considered an especially effective time for product absorption.
Q4: Does Ulike recommend toner before a ReGlow session?
Yes, Ulike's instructions recommend applying a toner for basic moisturizing after cleansing, while avoiding photosensitive products and products containing whitening ingredients before use.
Q5: What are the exact steps for using Ulike ReGlow?
Cleanse and dry your skin, connect the remote control to the mask, long-press the power button to turn it on, short-press to select your mode, then relax during the session.